-
1. 開始
-
2. Git 基礎
-
3. Git 分支
-
4. 伺服器上的 Git
- 4.1 通訊協定
- 4.2 在伺服器上取得 Git
- 4.3 產生您的 SSH 公開金鑰
- 4.4 設定伺服器
- 4.5 Git Daemon
- 4.6 智慧型 HTTP
- 4.7 GitWeb
- 4.8 GitLab
- 4.9 第三方託管選項
- 4.10 摘要
-
5. 分散式 Git
-
A1. 附錄 A:其他環境中的 Git
- A1.1 圖形化介面
- A1.2 Visual Studio 中的 Git
- A1.3 Visual Studio Code 中的 Git
- A1.4 IntelliJ / PyCharm / WebStorm / PhpStorm / RubyMine 中的 Git
- A1.5 Sublime Text 中的 Git
- A1.6 Bash 中的 Git
- A1.7 Zsh 中的 Git
- A1.8 PowerShell 中的 Git
- A1.9 摘要
-
A2. 附錄 B:將 Git 嵌入到您的應用程式中
-
A3. 附錄 C:Git 命令
A1.8 附錄 A:其他環境中的 Git - PowerShell 中的 Git
PowerShell 中的 Git
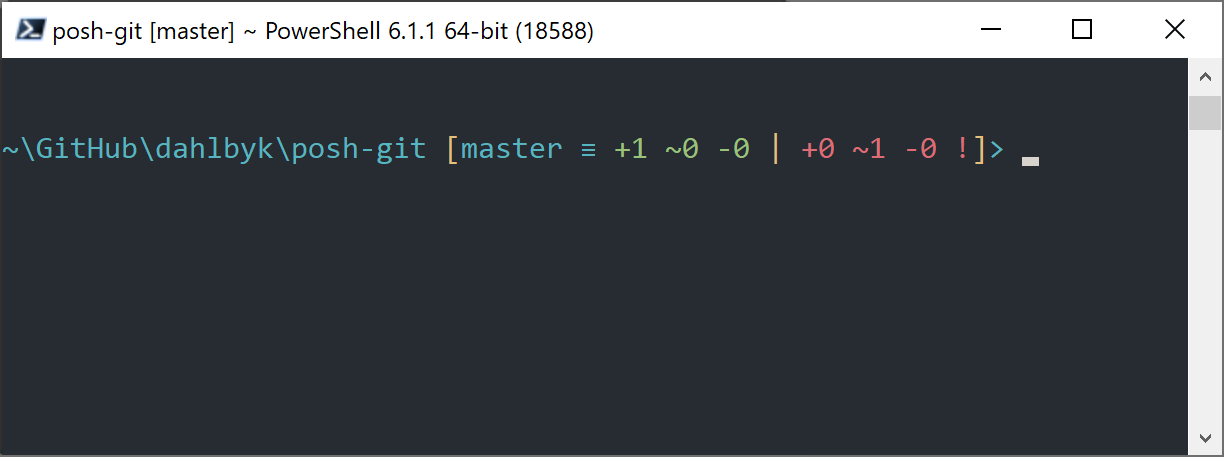
Windows 上的傳統命令列終端機 (cmd.exe) 並不真正具備自訂 Git 體驗的能力,但是如果您使用的是 PowerShell,您就很幸運了。如果您在 Linux 或 macOS 上執行 PowerShell Core,這也適用。名為 posh-git (https://github.com/dahlbyk/posh-git) 的套件提供強大的 Tab 鍵自動完成功能,以及增強的提示,協助您掌握儲存庫的狀態。它看起來像這樣
安裝
必要條件 (僅限 Windows)
您必須先將本機的 ExecutionPolicy 設定為 RemoteSigned (基本上,除了 Undefined 和 Restricted 以外的任何值),才能在您的電腦上執行 PowerShell 指令碼。如果您選擇 AllSigned 而不是 RemoteSigned,則連本機指令碼 (您自己的指令碼) 也必須經過數位簽署才能執行。使用 RemoteSigned 時,只有將 ZoneIdentifier 設定為 Internet (從網路下載) 的指令碼需要簽署,其他則不需要。如果您是管理員,並且想要為該電腦上的所有使用者設定,請使用 -Scope LocalMachine。如果您是一般使用者,沒有管理權限,則可以使用 -Scope CurrentUser 將其僅設定給您。
關於 PowerShell 範圍的詳細資訊:https://learn.microsoft.com/en-us/powershell/module/microsoft.powershell.core/about/about_scopes。
關於 PowerShell ExecutionPolicy 的詳細資訊:https://learn.microsoft.com/en-us/powershell/module/microsoft.powershell.security/set-executionpolicy。
若要將所有使用者的 ExecutionPolicy 值設定為 RemoteSigned,請使用下一個命令
> Set-ExecutionPolicy -Scope LocalMachine -ExecutionPolicy RemoteSigned -ForcePowerShell 資源庫
如果您至少有 PowerShell 5 或安裝 PackageManagement 的 PowerShell 4,您可以使用套件管理員來為您安裝 posh-git。
關於 PowerShell 資源庫的詳細資訊:https://learn.microsoft.com/en-us/powershell/scripting/gallery/overview。
> Install-Module posh-git -Scope CurrentUser -Force
> Install-Module posh-git -Scope CurrentUser -AllowPrerelease -Force # Newer beta version with PowerShell Core support
如果您想要為所有使用者安裝 posh-git,請改用 -Scope AllUsers,並從提升權限的 PowerShell 主控台執行命令。如果第二個命令失敗,並出現類似 Module 'PowerShellGet' was not installed by using Install-Module 的錯誤,您需要先執行另一個命令
> Install-Module PowerShellGet -Force -SkipPublisherCheck然後您可以返回並再次嘗試。發生這種情況的原因是,隨附 Windows PowerShell 的模組是使用不同的發佈憑證簽署的。
更新 PowerShell 提示字元
若要在您的提示字元中包含 Git 資訊,需要匯入 posh-git 模組。為了讓每次啟動 PowerShell 時都匯入 posh-git,請執行 Add-PoshGitToProfile 命令,這會將匯入語句加入您的 $profile 腳本中。這個腳本會在您每次開啟新的 PowerShell 主控台時執行。請注意,有許多 $profile 腳本。例如,一個用於主控台,另一個用於 ISE。
> Import-Module posh-git
> Add-PoshGitToProfile -AllHosts
從原始碼
從 https://github.com/dahlbyk/posh-git/releases 下載 posh-git 發行版,並將其解壓縮。然後使用 posh-git.psd1 檔案的完整路徑匯入模組
> Import-Module <path-to-uncompress-folder>\src\posh-git.psd1
> Add-PoshGitToProfile -AllHosts
這會將正確的行加入您的 profile.ps1 檔案中,並且下次您開啟 PowerShell 時 posh-git 就會啟用。
關於提示字元中顯示的 Git 狀態摘要資訊的說明,請參閱: https://github.com/dahlbyk/posh-git/blob/master/README.md#git-status-summary-information。如需關於如何自訂 posh-git 提示字元的詳細資訊,請參閱: https://github.com/dahlbyk/posh-git/blob/master/README.md#customization-variables。